You can take a screenshots of your whole screen or just part of it. Screenshots are saved automatically as .png files on your desktop.
Take a screenshot of your whole screen
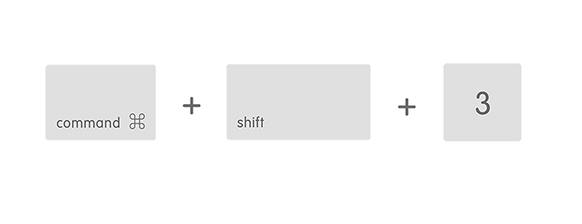
- Press Command (⌘)-Shift-3.
- Find the screenshot as a .png file on your desktop.
![]()
Take a screenshot of part of your screen
- Press Command (⌘)-Shift-4. You’ll see that your cursor changes to a crosshair pointer.
- Move the crosshair pointer to where you want to start the screenshot.
- Drag to select an area. To adjust the area, hold Shift, Option, or the Space bar while you drag.

- When you’ve selected the area you want, release your mouse or trackpad button. Or to cancel, press Escape (esc).
- Find the screenshot as a .png file on your desktop.